Filebeat学习
Filebeat学习
Filebeat简介
Filebeat 是使用 Golang 实现的轻量型日志采集器,也是 Elasticsearch stack 里面的一员。本质上是一个 agent ,可以安装在各个节点上,根据配置读取对应位置的日志,并上报到相应的地方去。
Filebeat 并不依赖于 ElasticSearch,可以单独存在。我们可以单独使用Filebeat进行日志的上报和搜集。filebeat 内置了常用的 Output 组件, 例如 kafka、ElasticSearch、redis 等,出于调试考虑,也可以输出到 console 和 file 。我们可以利用现有的 Output 组件,将日志进行上报。
Filebeat带有内部模块(auditd,Apache,Nginx,System和MySQL),可通过一个指定命令来简化通用日志格式的收集,解析和可视化。
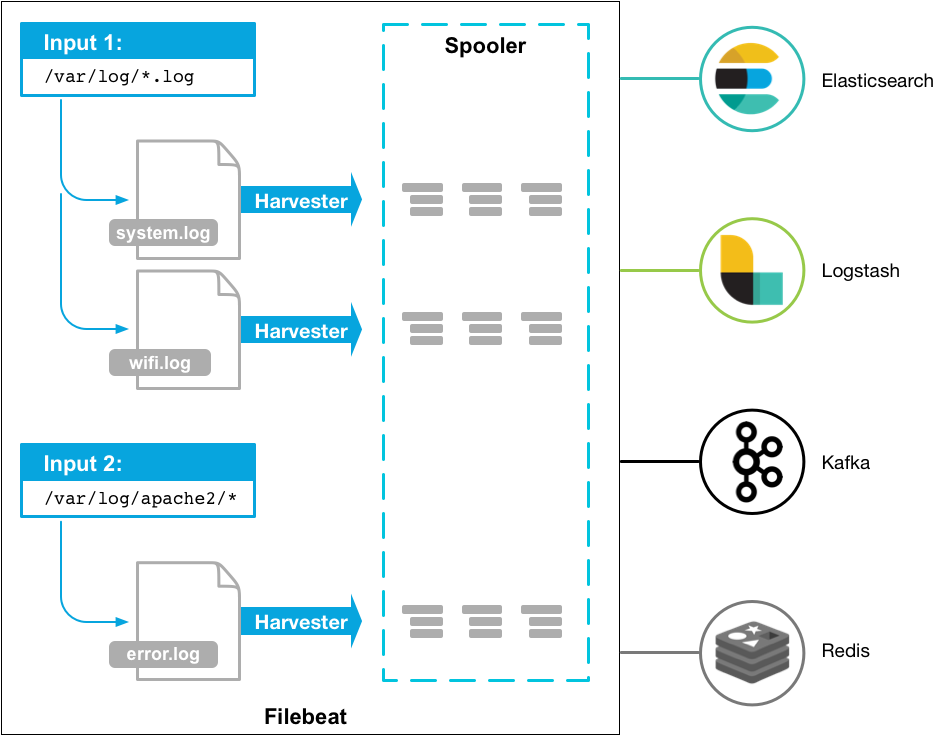
当启动 Filebeat 时,它会启动一个或多个输入,这些输入会在您为日志数据指定的位置中查找。对于 Filebeat 定位的每个日志,Filebeat 都会启动一个收割机。每个harvester 读取单个日志以获取新内容并将新日志数据发送到libbeat,libbeat 聚合事件并将聚合数据发送到您为Filebeat 配置的输出。
安装Filebeat
环境: Centos7.6 x64
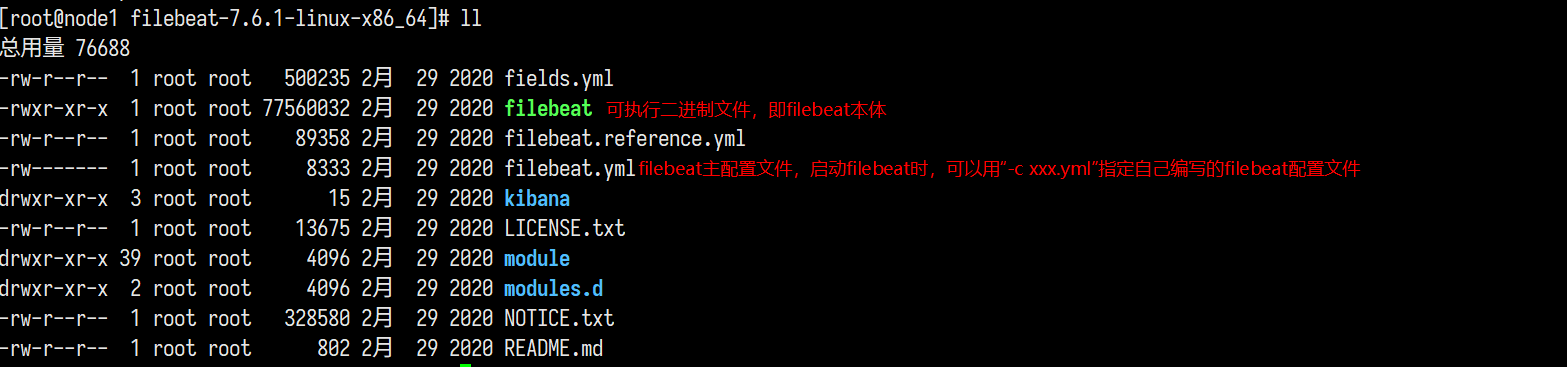
安装Filebeat
1 | curl -L -O https://artifacts.elastic.co/downloads/beats/filebeat/filebeat-6.8.23-linux-x86_64.tar.gz |
输入输出
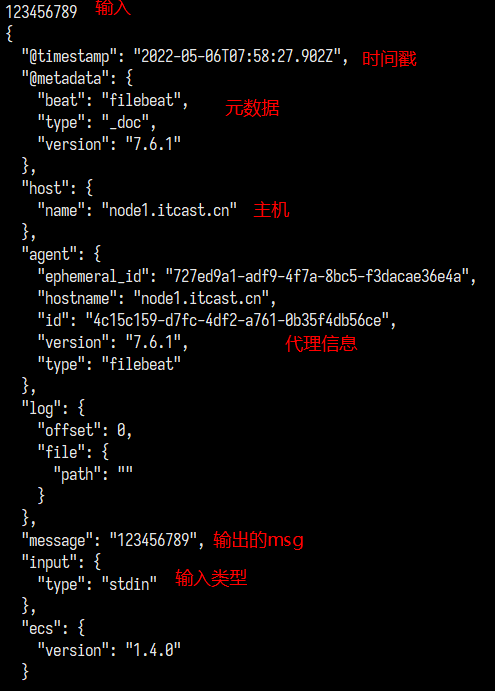
从控制台输入输出到控制台
在根目录下新建一个test01_filebeat.yml
1 | # 输入 |
跑起来
1 | ./filebeat -e -c test01_filebeat.yml # -c是配置文件位置 -e是强制在前端输出调试信息 |
测试控制台输入输出
改为log输入
在根目录下新建一个test02_filebeat.yml
1 | # 输入 |
跑起来
1 | ./filebeat -e -c test02_filebeat.yml |
测试
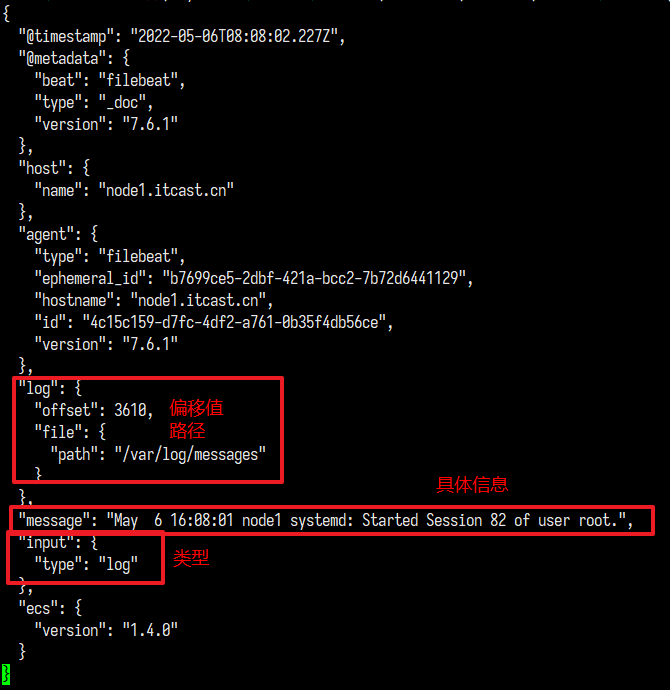
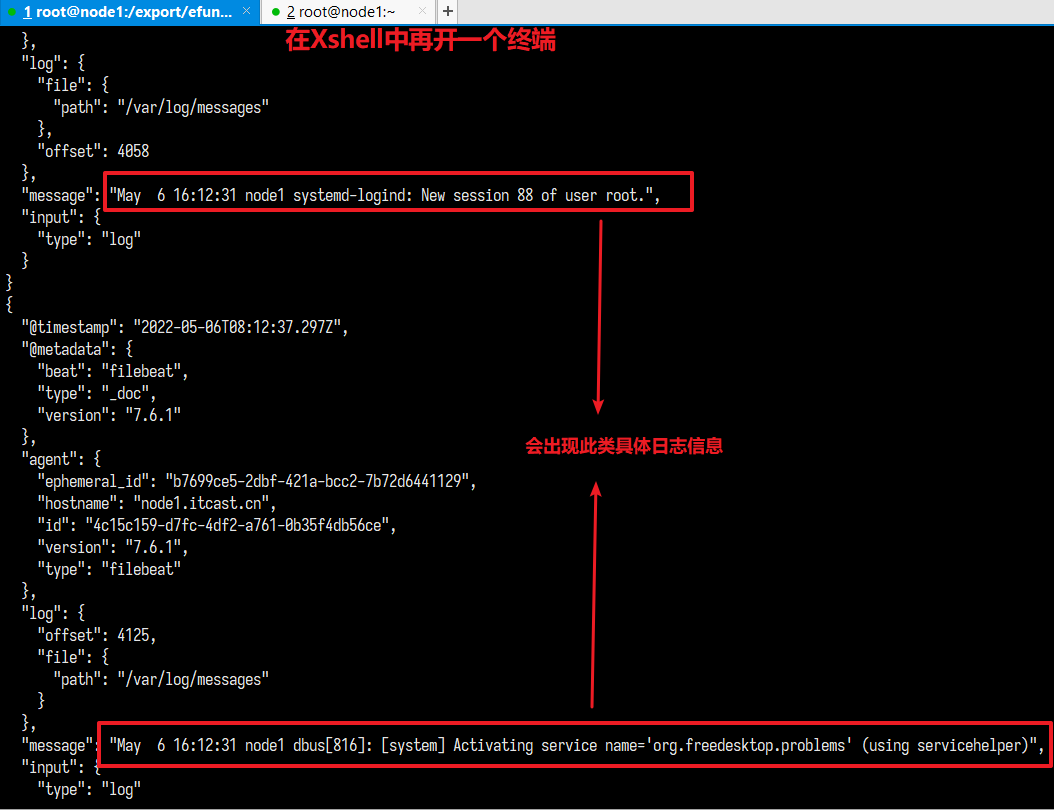
查看新操作的日志
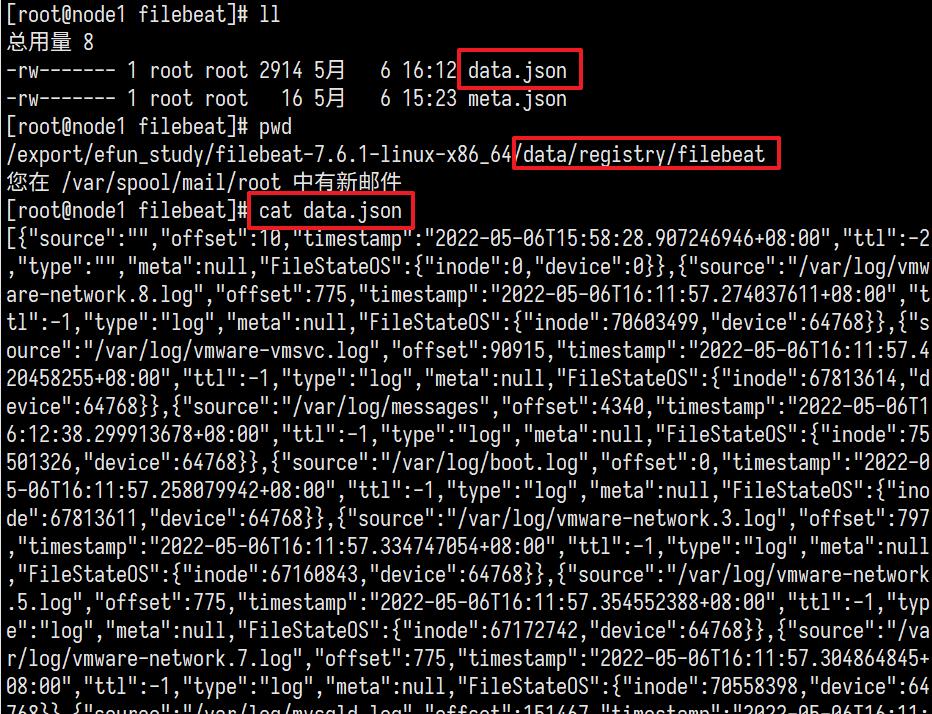
查看registry
配置自动加载
1 | mkdir configs # 根目录新建个config目录 |
将下面内容写到test03_filebeat.yml
1 | # 输入 |
将下面内容写到 configs/input.yml
1 | - type: log |
跑起来
1 | ./filebeat -e -c test03_filebeat.yml |
观察并发现和02配置文件效果相同
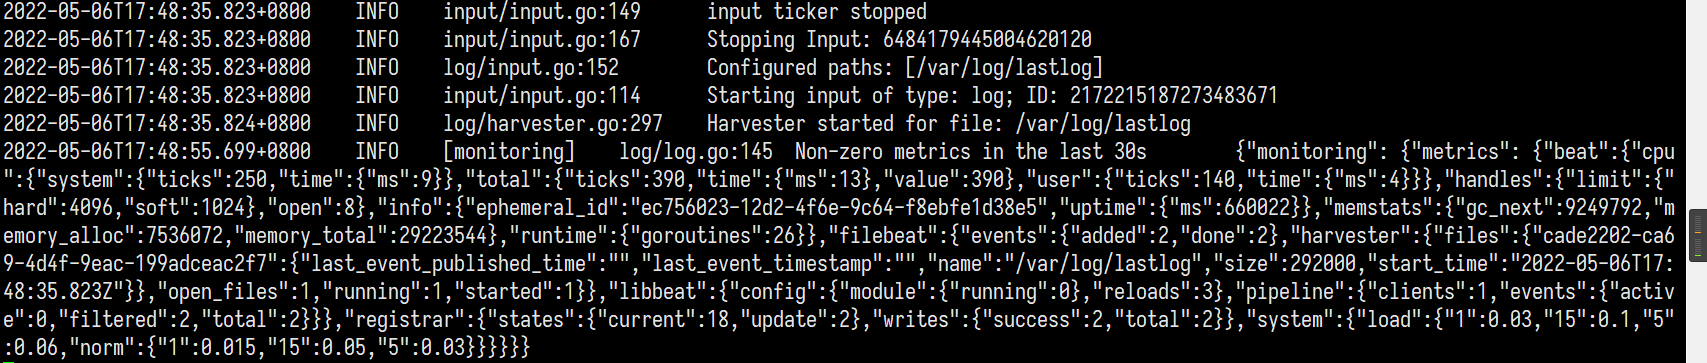
尝试更改configs/input.yml中的路径为/var/log/lastlog并保存
再次观察控制台

此时将记录系统上面所有账号最近登录时的信息进行输出
后台运行
i: 使用nohup ./filebeat -c xxx.yml >/dev/null 2>&1 &启动filebeat,配置从/var/log/message文件输入,输出到另外一个文件,输出内容只保留message字段(https://www.elastic.co/guide/en/beats/filebeat/6.8/file-output.html#file-output)(需检验)
ii: 观察输出的目标文件,使用tail -f持续读取目标文件,最后使用ps -aux|grep filebeat找到进程号,使用kill指令正常关闭(思考如果使用kill -9强行关闭,下一次开启后会发生什么)
将下面内容写到test04_filebeat.yml
输入方法不变 输出改为文件方式 并只取message
1 | # 输入 |
后台跑起来
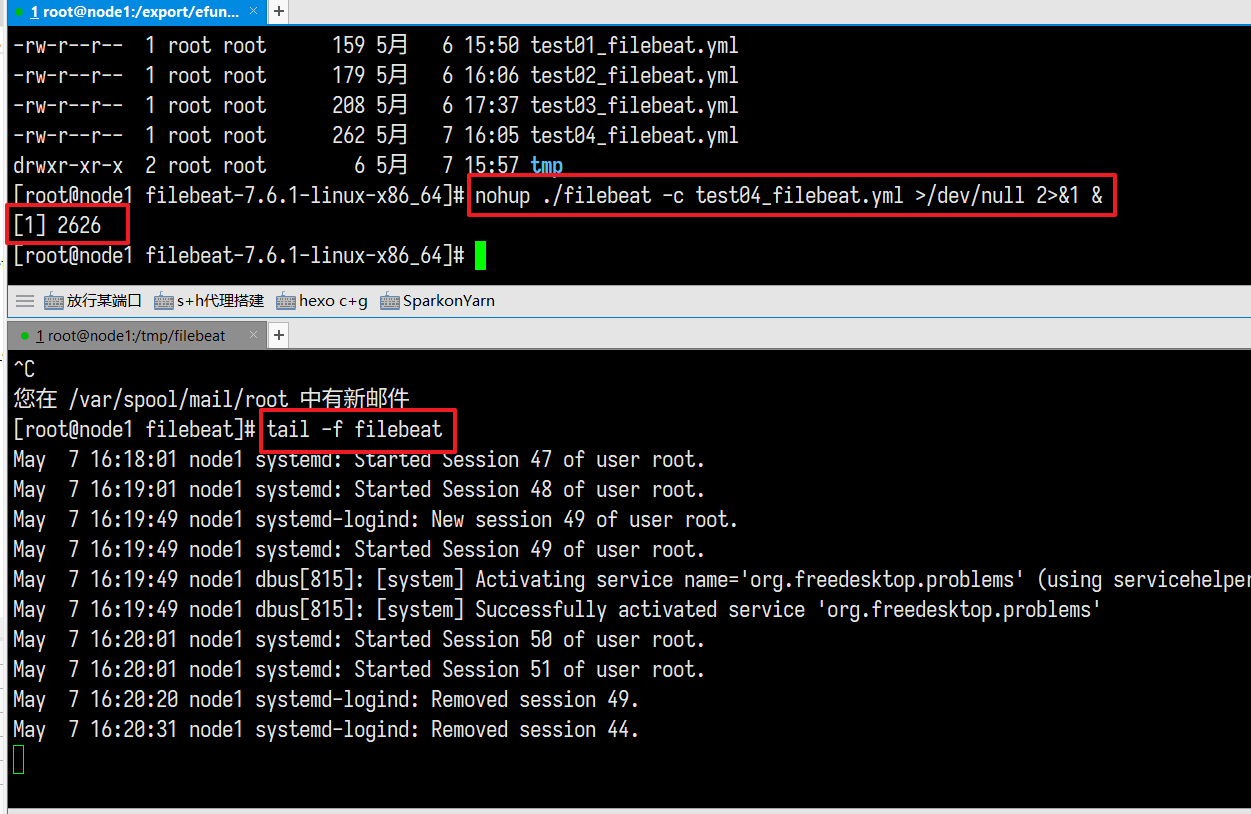
1 | nohup ./filebeat -c test04_filebeat.yml >/dev/null 2>&1 & |
持续查看/tmp/filebeat/filebeat文件
1 | tail -f /tmp/filebeat/filebeat |
停止运行杀进程

关于
kill -9的问题询问了何老师何老师:
kill -9的时候,registry文件可能还没来得及写入,就被强关了
下次写入的时候,registry就是上次记录的位置
registry文件一般一秒保存一次,这个频率生产环境会调高一些,比如10s
所以这个时候强关,最多重收10s内的数据
部分参数解释
(何老师给发了实际参数进行参考)
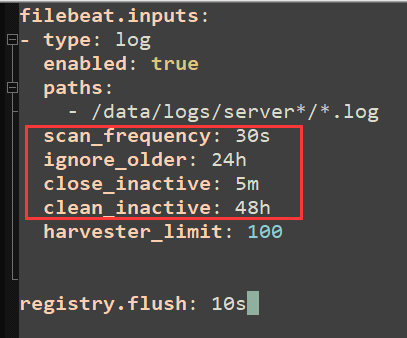
1 | scan_frequency: 表示多久扫描一次是否有新文件产生。比如设置 10s(默认),一个新文件产生 10s 后会被发现,或者一个旧文件新产生了一行日志 10s 才发现这个文件。 |
信息处理和字段加工
额外的信息处理和字段加工:
i: 为收集到的数据增加字段(https://www.elastic.co/guide/en/beats/filebeat/6.8/filebeat-input-log.html#filebeat-input-log-fields),添加字段后,查看输出的内容,和字段被追加的位置 (需检验)
ii: 条件判断语句,做实验查看是否可以丢弃该消息(https://www.elastic.co/guide/en/beats/filebeat/6.8/drop-event.html),并查看conditions内容
有用的链接:
filebeat输入:https://www.elastic.co/guide/en/beats/filebeat/6.8/configuration-filebeat-options.html
其中的log输入最常用,其他的也可以参考,官方文档非常齐全
filebeat输出:https://www.elastic.co/guide/en/beats/filebeat/6.8/configuring-output.html
其中的logstash输出,特别是kafka输出是我们常用的
filebeat收取日志为何不是实时的:https://copyfuture.com/blogs-details/20200320190930143yfpd95xo4zhu48x
自定义字段
将下面内容写到test05_filebeat.yml
并只取message和instance_id
1 | # 输入 |
跑起来
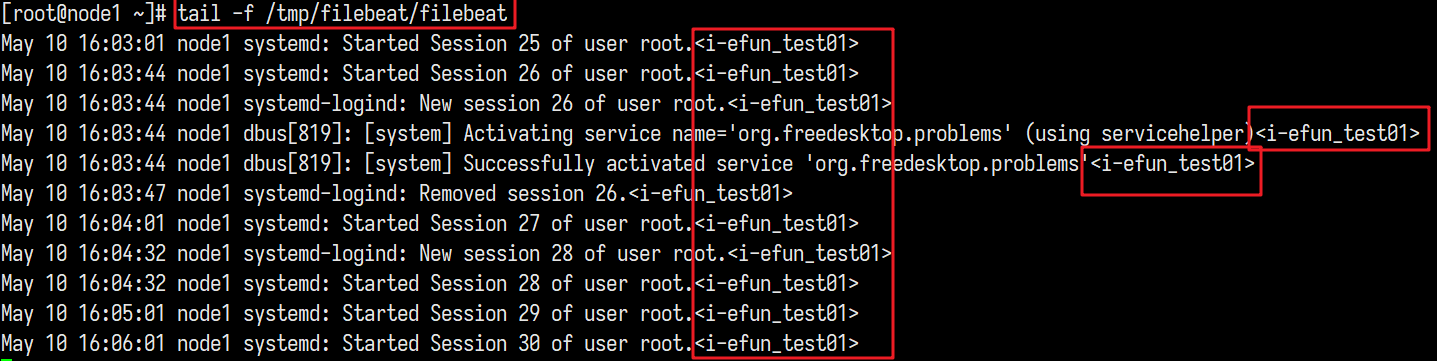
此时发现已经将我们所加的字段也提取了出来
丢弃事件

本次测试我们采用Drop events中的正则表达式来进行匹配筛选, 其他条件同理
将下面内容写到test06_filebeat.yml
1 | # 输入 |
跑起来

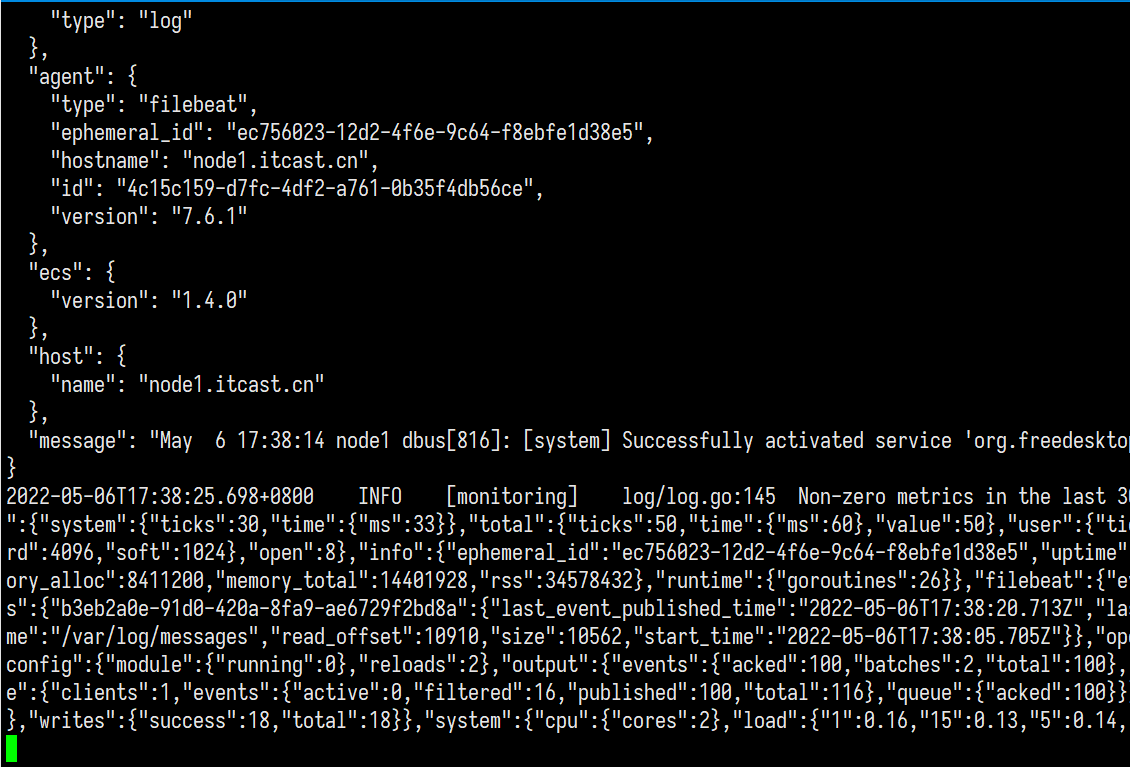
输出同预期, 将message字段中包含”systemd: Started Session”字符串的消息过滤掉了
同理可以过滤标签字段等等
其他输入输出
在Filebeat的6.8版本中提供了很多输入输出的接口
输入 :
输出 :
我们可以根据相关业务场景进行选择所需的输入输出接口
日志为什么不是实时获取
简单来说
filebeat收集日志的办法是, 每隔一段时间来”看看”是否有可供采集的文件, 对于已采集的文件,是否有新的写入
这个“每隔一段时间”就是采集时间差的主要来源
整个 filebeat 的流程可以分成三段:不同的输入 - 通用的处理 - 不同的输出。
这三段都可以影响采集的间隔时间
输入参数
1 | - type: log |
输出
1 | queue: |
我们可以通过对参数的调优来找到”最优解“